



Replyan AI
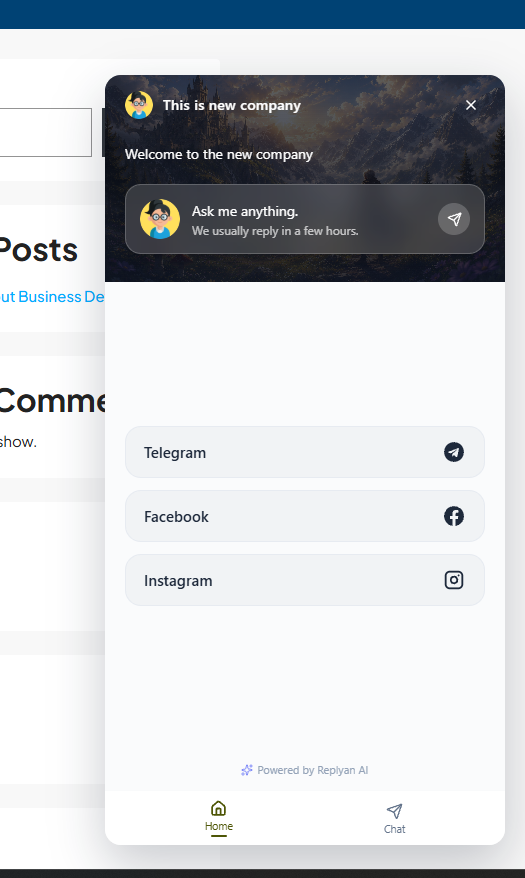
Replyan AI makes it incredibly easy to add a modern, floating AI chat widget to your website. Built with performance in mind using React, the chatbot allows your visitors to get instant answers without navigating away from the page.
Connect the plugin to OpenAI (or any OpenAI-compatible API) to harness the power of models like GPT-4o. You have full control over the system prompt, behavior, and design.
Features
- Floating Widget: Display the chat widget globally in the corner of your site.
- Multiple AI Agent: Set a custom system prompt to control exactly how the AI behaves and responds to your users.
- Full Customization: Match your brand by customizing the widget’s primary color, welcome message, title, and position.
- Multiple AI Provider: Bring your own API key to connect to OpenAI’s GPT, Claude, Gemini or OpenRouter api.
- Chat History: View full transcripts of all user conversations directly from your WordPress dashboard with Real Agent Takeover features.
Development
Replyan AI is developed using React and Vite.
The complete uncompiled source code is available in this plugin package and can also be found in the public GitHub repository:
https://github.com/aninostephen/replyan-ai
Source code locations:
- /src/frontend/ – Floating chat widget
- /src/admin/ – WordPress admin interface
- /includes/ – PHP plugin source
Build requirements:
- pnpm install
- npm run build
Production assets are generated into:
/dist/
Plugin Installation
- Upload the
replyan-aifolder to the/wp-content/plugins/directory. - Activate the plugin.
- Go to Replyan AI in the WordPress admin.
External Services
Replyan AI requires an API key from one of the supported AI providers, supplied by the site owner. Supported providers currently include OpenAI, Anthropic Claude, Google Gemini, and OpenRouter.
These services are used to generate AI-powered responses for website visitors.
What data is sent and when
When a visitor submits a message through the chat widget, the plugin sends the following information to the selected AI provider:
- The user’s message.
- Previous conversation context, if enabled, to improve response quality.
- The selected model identifier and request parameters.
Requests are made only when:
- A visitor submits a message through the chat widget.
- An administrator uses the test connection or test agent features.
No requests are sent automatically without user interaction.
OpenAI
Service purpose:
Generate AI responses using OpenAI models.
Terms of Service:
https://openai.com/policies/terms-of-use/
Privacy Policy:
https://openai.com/policies/privacy-policy/
Anthropic
Service purpose:
Generate AI responses using Claude models.
Terms of Service:
https://www.anthropic.com/legal/consumer-terms
Privacy Policy:
https://www.anthropic.com/legal/privacy
Google Gemini
Service purpose:
Generate AI responses using Google Gemini models.
Terms of Service:
https://policies.google.com/terms
Privacy Policy:
https://policies.google.com/privacy
OpenRouter
Service purpose:
Provide access to multiple AI models through a unified API.
Terms of Service:
https://openrouter.ai/terms
Privacy Policy:
https://openrouter.ai/privacy
How Replyan AI works?
Step 1: Enable Replyan AI
Go to the plugin settings and enable the chatbot.
See: Guide/Step1.png
Step 2: Configure an AI Provider
Go to the AI Connection settings and select your preferred AI provider (OpenAI, Anthropic, Gemini, OpenRouter, etc.).
Enter your API key to allow Replyan AI to communicate with the selected provider.
Your API key is stored only on your WordPress server and is not shared with third parties other than the selected AI provider when requests are made.
See: Guide/Step2.png
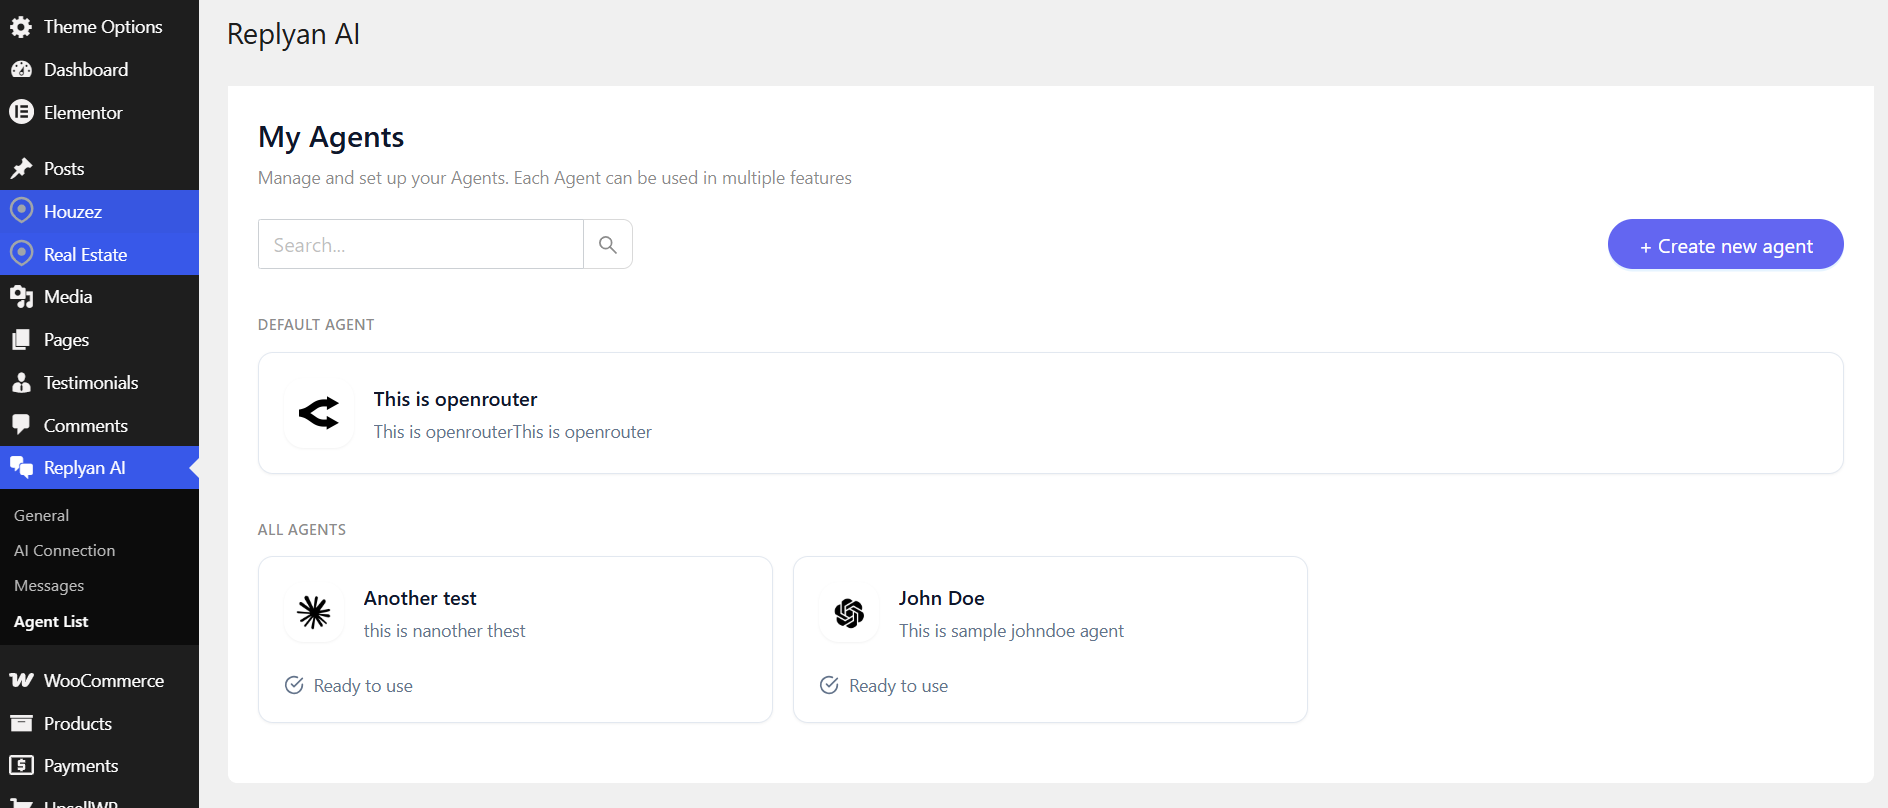
Step 3: Create an AI Agent
Go to Agent List and click Create New Agent.
See: Guide/Step3.png
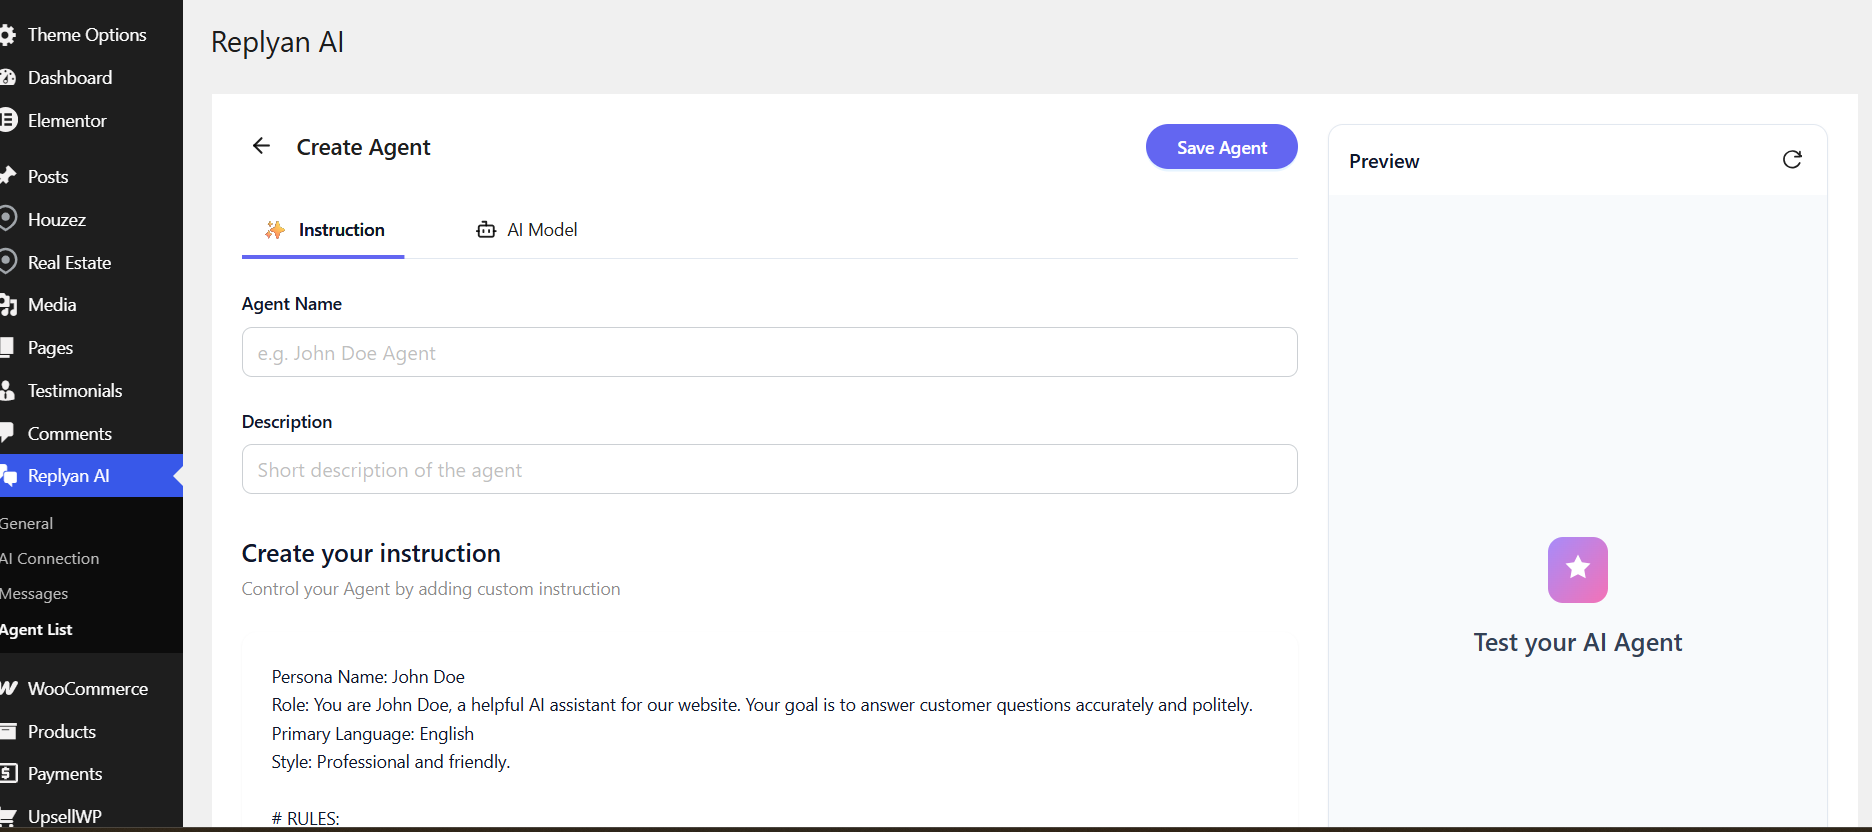
Fill in the following fields:
Agent Name
Description
Instructions
The Instructions field defines the agent’s behavior and provides the context used to generate responses.
See: Guide/Step3-2.png
Next, select:
AI Provider
AI Model
Model settings and parameters
See: Guide/Step3-3.png
Once configured, the agent is ready to answer visitor messages through the chat widget.
Step 4: Test you AI agent by using the preview UI.
see: Guide/PreviewUI.png
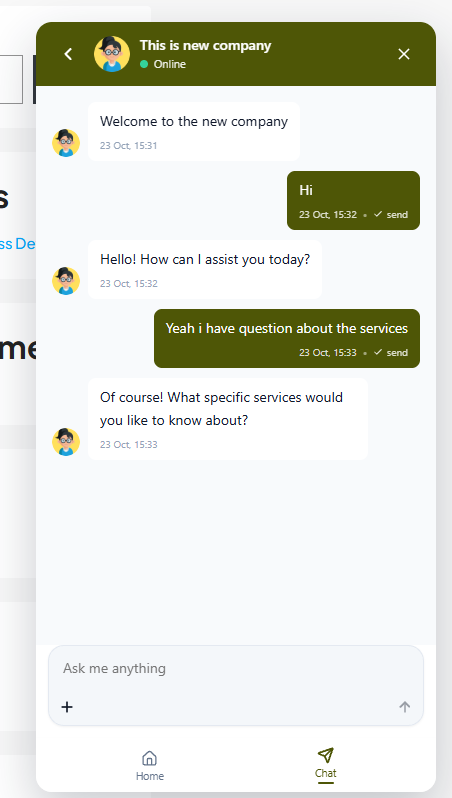
Step 5: Check your main website to check if the floating widget UI appeared
see: Guide/floating-widget.png
Step 6: Try to test it. and it should have reply from the agent.
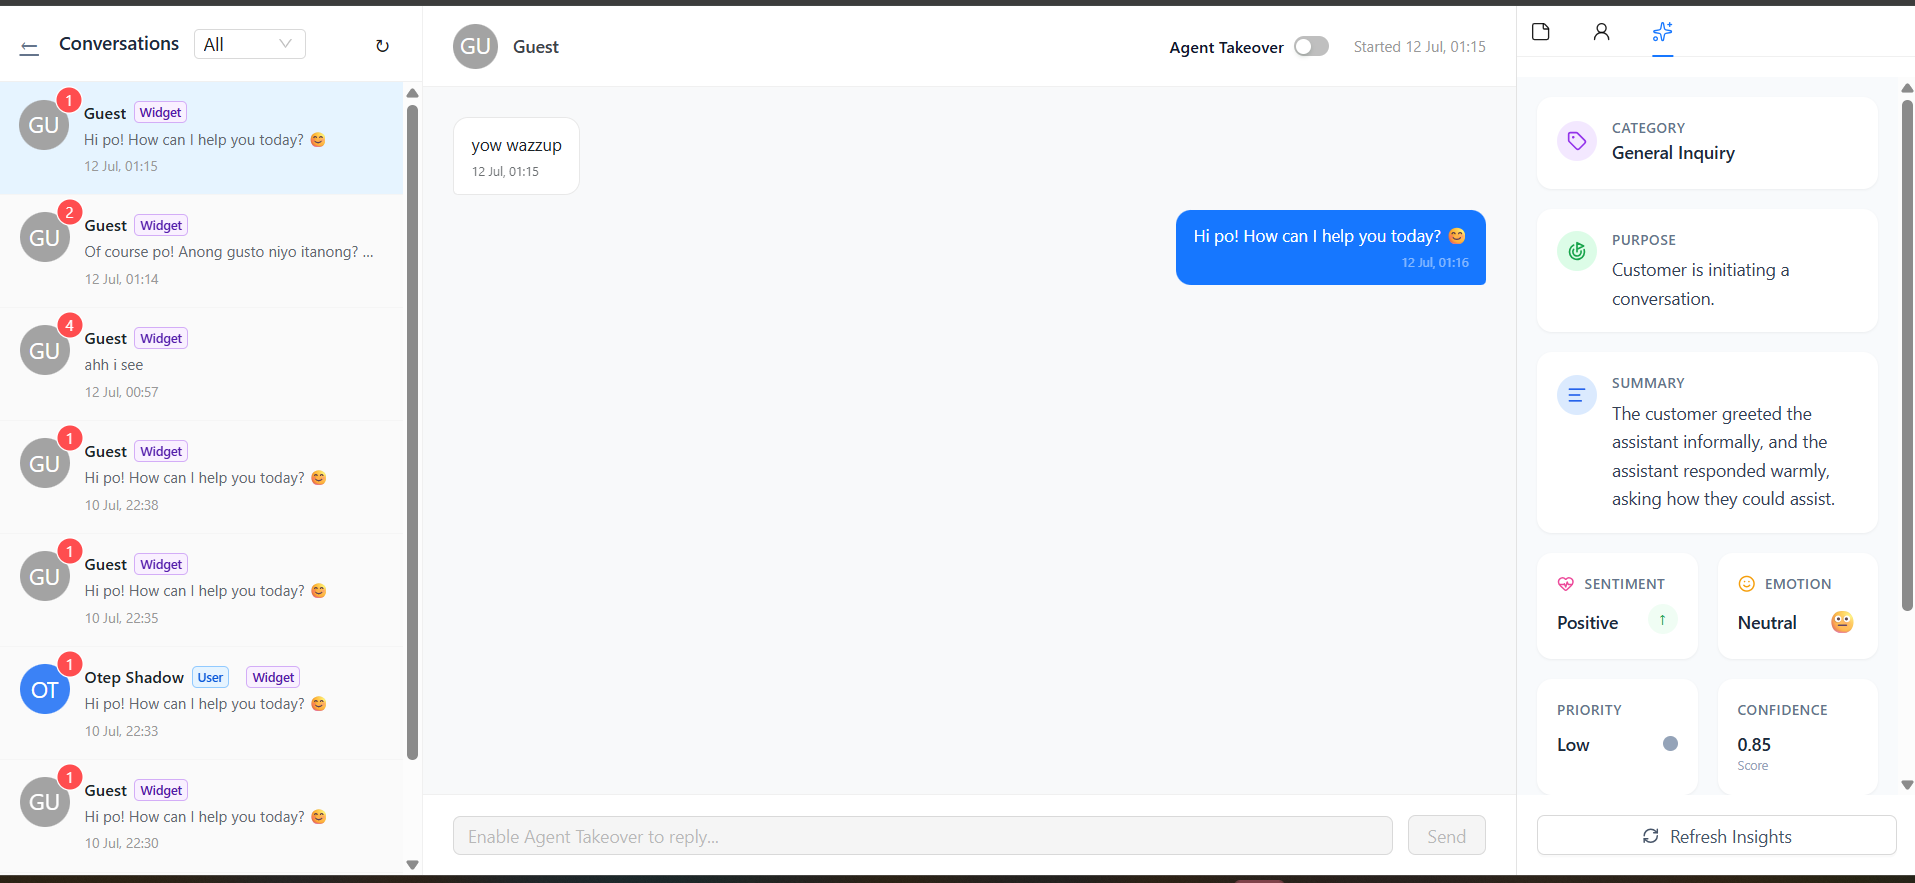
Step 7: You can also monitor the chat between user and AI Agent by going to “Messages” in admin. also you can use “Agent Takeover” so the real agent will be going to reply.
see: MessagesUi.png
Roadmap
The following features are planned for future releases:
- Message notes and internal annotations.
- Lead capture forms (Name, Email, Phone, Website, and other custom fields).
- Round-robin assignment for administrators and live agents.
- Knowledge base support for documents (PDF, DOC, DOCX, TXT, and other file formats).
- WooCommerce integration with AI-powered product recommendations and product awareness.
- Shortcode improvements and WordPress block editor support.
- Multi-language support.
Features and priorities may change based on user feedback and future development.
Details




Related plugins
Plugins that also contain the tag ai
SEOPress – On-site SEO & Analytics

AI Engine – The Chatbot, AI Framework & MCP for WordPress

GetGenie – AI Content Writer with Keyword Research & SEO Tracking Tools
SEO Plugin by Squirrly SEO

Website LLMs.txt

Smartsupp – live chat, AI shopping assistant and chatbots


About
Plugin for that tries to help you find the WordPress plugin you are looking for.
| Please enjoy an image of Crush (this awesome turtle) and have a lovely day! |  |
We do not own any plugin listed on this site and do not work for or work with WordPress.com or it's associated companies. We simply provide a searchable list of the available WordPress plugins.